The other day, the interview group who went to Google I/O came back to Japan and came back with the head -mounted display "Cardboard" as a souvenir.If you are a Cardboard, please check it out because Naveko has reviewed it.
This Cardboard was impressed.There are few materials and easy to assemble.Even though it is easy, you can experience VR space like Oculus Rift.
Just the night when the review article was up, the editor -in -chief Miyano asked the editorial department to the pizza.Looking at the pizza box, I thought like this.
"Isn't this box made like a Cardboard?!"
The idea is inspired.It is an action as soon as you think.I borrowed the lid before the box was thrown away.
Google publishes this CardBoard for free online.However, it is difficult to prepare all the materials recommended by Google in Japan.I went to Daiso if there was something that could be substituted and prepared materials that could be used.
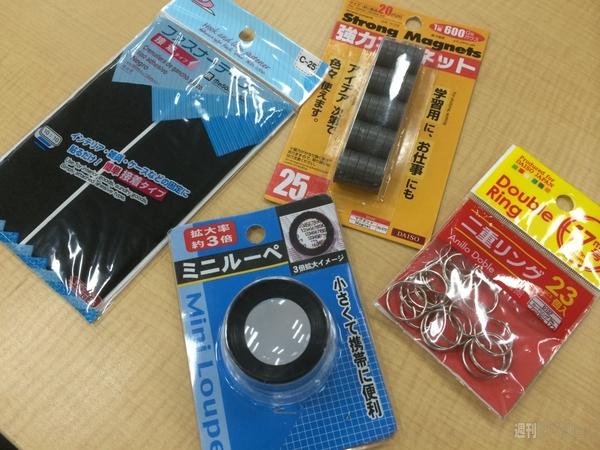
Here is the material I bought.
■ Ingredients, cardboard (pizza box), loupe, velcro, magnet, tape for fixing, scissors, cutter
The most troublesome part is the lens.Google recommends a double convex lens with a focal length of 40 mm.Buying the same lens as a camera is too expensive, so this Daiso mini -loupe is a result of considering materials that can be used instead.
The decomposition was easy, and one had two lenses.
Let's look at how to make it when the materials are available.
1.Download the blueprint
You can download the PDF in the blueprint from the official website of Google Cardboard.After downloading, print it on A4 size paper.
After printing, cut it with scissors and paste it on the cardboard.
2.Let's cut the cardboard
Cut the cardboard according to the paper you put.

When I was working, I thought it was very difficult to remove the joints and the holes to put the lens.The pizza box was surprisingly hard, and my heart was about to break, but I will do my best without breaking down.
3.Let's assemble
If you can cut the cardboard, we will assemble it.
If the cardboard is thick and cannot be bent, it may be easier to cut it apart and connect it with tape.
Four.Attach the lens
Attach the disassembled mini loupe in the hole that is opened in cardboard.I think that the hole should be cut with a file according to the size of the lens.
Five.Put the Velcro on the lid
Paste the Velcro that you bought at Daiso on the main body and the lid.Attach the smartphone and fix it with the lid.
| ふたを閉めればこのとおり |
6.Complete
Although it is a little distorted, it is completed.This is your own head -mounted display!
| ほのかに臭う、ピザの香り |
If you actually install the VR app on your smartphone and look at it, you can see it in 3D.It's a bit confusing in the photo.
■ Results
Head -mounted display can be easily made even if you have a 100 yen shop!
Google Play has a variety of VR apps, so if you are actually interested, please make it yourself and enjoy it.
Cardboard
Google Play Price: Free Development Google Inc.(The price is at the time of the article creation)
Download on Google Play
Dive City Rolercoaster
Google play価格:無料 開発 Dive Games (The price is at the time of the article creation)
Download on Google Play
Tuscany Dive
Google play価格:無料 開発 FabulousPixel (The price is at the time of the article creation)
Download on Google Play
Hang gliding
Google play価格:無料 開発 i-mmersive (The price is at the time of the article creation)
Download on Google Play
Dive Deep
Google play価格:無料 開発 Dive Games (The price is at the time of the article creation)
Download on Google Play
